What have you learnt about technologies from the process of constructing this product?
I’ve learnt a lot about the different hardware needed to make a sequence really work such as the shotgun and boom mics attached to the camera which i never really considered before. Using the camera and equipment on the shoots was really fun but also challenging at times, especially when trying to get a difficult pan of zoom to go smoothly. The software was hard to understand the first few editing sessions but then I got used to figuring out how to cut and re-position clips in Adobe Premier Pro. Working on a non-linear timeline made swapping shots and cutting clips a lot easier than I expected.
Hardware used:
Camera - We used a Canon HV30 Camcorder for the filming. I had used this before in the preliminary task but using it a lot more while not actually acting helped my understanding of shots and shot angles a lot more. It was easier to picture the different angles when actually looking through the camera, which helped the relocation of many of the shots, especially since it is very small and so portable. I’m very confident in using the camera now, I didn’t really have any problems with it apart from the zoom and pan shot on the test shoot; this took a while to get used to and try and do smoothly.
Tripod - this wasn’t difficult to set up, and after the first tutorial given on how to operate it safely there weren’t any problems using it, just with the movement of pans which had to be adjusted to perfection at times.
Shotgun and Boom mic - the shotgun mic was easy to operate and it was interesting to experiment with the different settings to see which setting was better for a long shot and which better for cancelling out background sound. The boom mic was mainly just about making sure that it isn’t seen in the shot and that you don’t hurt yourself over the long wire.
Paglight - we didn’t actually end up needing to take any paglights because we felt that the light in the first shoot was more than enough for the opening of the film, and since we didn’t end up doing outside shots of a man walking like in initial ideas we didn’t need any extra lighting.
Clapperboard - We used this for every shot which helped greatly during editing as we didn’t have to check the shot log for every entry and time code to know which shot was where on the tape.
USB mic - we used this during editing for clearer sound recording straight from the camera, as the quality wasn’t good enough from the actual answering machine.
The hardware was fairly straightforward to use especially after the health and safety session in school helped clear up any questions on how to use equipment and strictly told us what not to do with equipment.
Software used:
Adobe Premier Pro - All of the editing was done on Adobe Premier Pro for the footage we filmed, which was done on a non-linear timeline which meant that editing was easier as clips could be moved around as wished. I’ve learnt a lot about editing during the construction of this project such as adding effects to the clips such as fade and sound enhancers to the audio clips.
I experimented a lot with pretty much any audio effect on the program to add a distortion to the sound clips of the messages that were recorded using the mic, to make them sound as if they were coming from the answering machine. This way we could choose how much we wanted to enhance the messages leaving them clear enough for people to understand. However, after seeing the screening our test audience all said that they would improve the sequence by making the sound of the final messages more clear, which I would definitely do in hindsight of the problem.
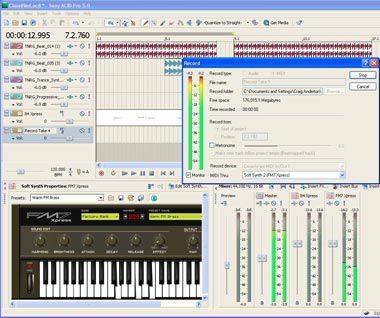
Acid 5.0 - It was my first time ever using a recording program on a PC so I was quite excited to find out how to use it. We connected up a USB microphone to the computer and then recorded straight from the camera playback and also from the recordings on Patricia’s mobile to compare the two sound qualities and see which one would be more suitable in the film.
Mac - Livetype - We used this program to create the titles that were going to be exported into our edited sequence. I learnt how to do a lot of the program, with it being my first time ever using an Apple Mac. I learnt to reposition text and adjust the size to get the effect we wanted. We added a glow effect after choosing our font for the title, so that the film title would have a slightly eerie feel to it. I also played around with the different entering and exiting effects for the text and so understood the basics of how to use Livetype.
Our final finished title using Livetype.
Internet Explorer - This I was very familiar with due to using it all the time, and so the blogging, researching and production using Internet Explorer was very easy and didn't take too long.


No comments:
Post a Comment